
Zoom H1 Instruction Manual⁚ A Comprehensive Guide
Welcome to the comprehensive guide for the Zoom H1 Handy Recorder! This manual offers a detailed exploration of the Zoom H1‚ ensuring users can effectively utilize its features. From basic operations to advanced troubleshooting‚ we’ll cover everything.
Overview of Zoom H1 Features
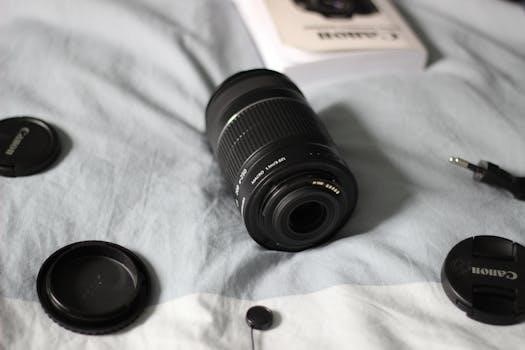
The Zoom H1 Handy Recorder is a versatile device packed with features perfect for musicians‚ journalists‚ podcasters‚ and anyone needing high-quality audio recording. At its core‚ the H1 boasts a 90° X/Y stereo microphone configuration‚ capturing audio with excellent clarity and spatial accuracy. This setup ensures a well-balanced stereo image‚ ideal for recording music performances‚ interviews‚ or ambient soundscapes;
Beyond the microphone‚ the H1 offers several key features. It records in WAV format at up to 24-bit/96kHz‚ providing pristine audio quality suitable for professional applications. The device also supports MP3 recording for smaller file sizes and extended recording times. A built-in low-cut filter helps reduce unwanted background noise‚ such as wind rumble or air conditioning hum‚ resulting in cleaner recordings.
The H1 includes a headphone output for real-time monitoring of your recordings and a USB port for easy file transfer to your computer. It can also function as a USB microphone‚ expanding its versatility for online meetings‚ voiceovers‚ and streaming. Powered by a single AA battery‚ the H1 offers impressive battery life‚ making it a reliable tool for on-the-go recording. The user-friendly interface and intuitive controls make the H1 accessible to both beginners and experienced users alike.
Turning the Zoom H1 On and Off
Operating the power function of the Zoom H1 is straightforward. Locating the power switch is the first step. You’ll find it typically on the side of the device‚ clearly marked with the universal power symbol. To power the Zoom H1 on‚ gently slide the power switch downwards and hold it in that position for approximately one second. This deliberate action prevents accidental activation‚ ensuring the device powers up only when intended.
Once the power switch is held‚ the H1’s display screen will illuminate‚ indicating that the device is booting up. After a brief initialization sequence‚ the H1 will be ready for recording. To turn the Zoom H1 off‚ repeat the same action. Slide the power switch downwards and hold it for about one second. The display screen will then power down‚ confirming that the device is completely off.
It’s crucial to ensure the H1 is fully powered off when not in use to conserve battery life. Leaving the device on‚ even in standby mode‚ will gradually drain the battery. Properly turning the H1 off will maximize battery performance and ensure it’s ready for your next recording session. Remember to double-check that the display is dark before storing the device.
Adjusting Volume Levels on the Zoom H1
Achieving optimal audio quality with the Zoom H1 hinges on properly adjusting the volume levels. The H1 offers intuitive controls for managing both input and output volumes. To adjust the recording volume‚ locate the physical gain control buttons on the side of the device. These buttons‚ often marked with “+” and “-” symbols‚ allow you to increase or decrease the input level.
When recording‚ monitor the input levels using the H1’s display screen. Aim for a level that peaks just below the maximum to avoid clipping or distortion. If the level is too low‚ raise the gain until the meter registers a strong signal. Conversely‚ if the level is too high‚ reduce the gain to prevent overloading the microphone.

For playback‚ the H1 features dedicated volume buttons to control the output level through headphones or external speakers. These buttons function similarly to the gain control buttons‚ allowing you to raise or lower the volume to your desired listening level. Start with a low volume setting and gradually increase it until the audio is clear and comfortable. Be mindful of your hearing and avoid listening at excessively high volumes for extended periods. Careful adjustment ensures clear recordings and enjoyable playback.
Using the Zoom H1 as a USB Microphone
The Zoom H1’s versatility extends beyond portable recording; it can also function as a high-quality USB microphone for your computer. This feature is particularly useful for podcasting‚ voice-over work‚ online meetings‚ and streaming. To utilize the H1 as a USB microphone‚ connect it to your computer using the provided USB cable.
Once connected‚ your computer should automatically recognize the H1 as an audio input device. You may need to select the Zoom H1 as your default microphone in your computer’s sound settings or within the specific application you intend to use. The exact steps for selecting the microphone may vary depending on your operating system (Windows or macOS) and the software you are using.

In most cases‚ you’ll find the audio input settings within the application’s preferences or settings menu. Look for options labeled “Microphone‚” “Input Device‚” or “Audio Source.” Select the Zoom H1 from the list of available devices. With the H1 properly configured‚ you can now enjoy its superior sound quality for all your computer-based audio needs. Remember to adjust the input level on the H1 to avoid clipping.
Connecting Headphones to the Zoom H1
Connecting headphones to your Zoom H1 is crucial for monitoring audio during recording and playback. This allows you to accurately assess the sound quality and make necessary adjustments to ensure optimal recordings. The Zoom H1 features a dedicated headphone output jack‚ typically located on the side or bottom of the device‚ clearly marked with a headphone symbol.
To connect your headphones‚ simply plug the headphone jack into this output. Once connected‚ you can use the volume control buttons‚ usually situated near the headphone jack‚ to adjust the listening level. It’s important to start with a low volume and gradually increase it to a comfortable level to prevent hearing damage. Monitoring through headphones allows you to hear exactly what the H1 is recording‚ enabling you to identify and address any issues such as background noise‚ distortion‚ or incorrect microphone placement.
Furthermore‚ using headphones during playback lets you review your recordings immediately after capture‚ ensuring you’ve achieved the desired audio quality. The headphone output also functions as a line output‚ allowing you to connect the H1 to external speakers or other audio equipment for broader listening purposes. Remember to always handle your headphones with care to avoid damaging the connector or cable.

Troubleshooting Overload and Distortion Issues
Experiencing overload and distortion with your Zoom H1 can be frustrating‚ but it’s often easily resolved. Overload‚ indicated by a flashing peak indicator on the device‚ occurs when the input signal is too high‚ causing the audio to clip and distort. The primary cause is recording audio sources that are too loud.
The first step is to reduce the input level. This can be done by adjusting the recording level settings on your Zoom H1. Try lowering the level until the peak indicator no longer flashes during the loudest parts of your recording. If you’re recording a very loud source‚ such as a concert‚ consider moving the H1 further away from the sound source to reduce the signal strength.
Another helpful feature is the auto-level control‚ though manual adjustments often yield better results. Make sure the auto-level isn’t set too high‚ as it can amplify even relatively quiet sounds to the point of distortion. For more precise control‚ switch to manual level adjustment. Additionally‚ check for any obstructions near the microphone that might be causing unwanted vibrations or noise. If the problem persists‚ consider using an external microphone with its own gain control to further manage input levels. Regularly monitoring your audio levels through headphones is vital for preventing overload and ensuring clean‚ clear recordings.
Understanding the Low Cut Filter
The Zoom H1’s low cut filter is an essential tool for improving audio quality by reducing unwanted low-frequency noise. This filter‚ also known as a high-pass filter‚ attenuates frequencies below a certain threshold‚ effectively removing rumble‚ wind noise‚ and other low-end disturbances that can muddy your recordings. Understanding how and when to use it is key to achieving cleaner‚ more professional-sounding audio.
The low cut filter is particularly useful in outdoor recording situations where wind noise is prevalent. It helps to eliminate the distracting whooshing sounds caused by wind hitting the microphone. Similarly‚ it can be beneficial indoors to reduce rumble from air conditioners‚ traffic noise‚ or even vibrations transmitted through the recording surface. However‚ it’s important to use the filter judiciously‚ as excessive use can thin out the desired audio signal‚ making it sound unnatural or lacking in bass.
Experiment with the low cut filter in different recording environments to determine the optimal setting for your needs. Listen carefully to the recorded audio with and without the filter engaged to assess its impact on the overall sound quality. If you’re recording speech or instruments with significant low-frequency content‚ such as a bass guitar‚ be cautious about using the low cut filter‚ as it may remove essential elements of the sound. Always aim for a balanced approach‚ minimizing unwanted noise while preserving the integrity of your intended audio.
Accessing and Downloading the Firmware Update
Keeping your Zoom H1’s firmware up-to-date is crucial for optimal performance and access to the latest features and bug fixes. Firmware updates enhance the device’s stability‚ improve audio quality‚ and address any known issues. Accessing and downloading these updates is a straightforward process that ensures your H1 operates at its best.
To begin‚ visit the official Zoom website (www.zoom.co.jp) using a computer with internet access. Navigate to the “Support” or “Downloads” section of the website. Locate the specific page for the Zoom H1 Handy Recorder. Here‚ you will find the latest firmware update available for download. Ensure that you download the correct firmware version for your specific H1 model.
Carefully read the instructions provided on the website before proceeding with the download. The instructions will outline the steps required to install the firmware update on your Zoom H1. Download the firmware file to your computer. The file is typically a compressed archive (e.g.‚ ZIP file). After the download is complete‚ extract the contents of the archive to a convenient location on your computer. Be sure to have a microSD card ready‚ as you may need it for the update process‚ following Zoom’s specific instructions. It’s important to follow Zoom’s instructions precisely to avoid any issues.
Locating the User Manual and Bundled Software Information
Accessing the user manual and information about bundled software is essential for fully leveraging the capabilities of your Zoom H1 Handy Recorder. The user manual provides detailed instructions on all aspects of the device‚ from basic operations to advanced features. Bundled software can further enhance your audio recording and editing experience.
The user manual for the Zoom H1 can typically be found in a few different ways. Firstly‚ check the packaging that came with your Zoom H1. Many times‚ a physical copy of the manual is included. If you don’t have a physical copy‚ or prefer a digital version‚ visit the official Zoom website (www.zoom.co.jp). Navigate to the “Support” or “Downloads” section and find the page dedicated to the Zoom H1. Here‚ you should find a downloadable PDF version of the user manual in multiple languages.
Regarding bundled software‚ information about included programs (like Steinberg WaveLab LE or Steinberg Cubase LE) and links to download them are usually provided either within the product packaging or on the Zoom website alongside the user manual. Look for a section titled “Bundled Software” or “Included Software”. You may need to register your Zoom H1 on the website to access the software downloads and license keys. Ensure you follow the instructions provided to properly install and activate the bundled software for seamless integration with your Zoom H1.
Exploring Zoom’s YouTube Channel for Tutorials
Zoom’s official YouTube channel is a valuable resource for Zoom H1 users‚ offering a wealth of tutorials and demonstrations to enhance your understanding and usage of the device. The channel is regularly updated with content designed to help users of all skill levels‚ from beginners to advanced audio enthusiasts. By exploring Zoom’s YouTube channel‚ you can discover hidden features‚ learn best practices for recording‚ and troubleshoot common issues.
The channel features a variety of video formats‚ including product demos that showcase the Zoom H1’s capabilities‚ how-to guides that walk you through specific tasks‚ and creator inspiration videos that highlight innovative ways to use the device. You can find tutorials on topics such as setting up the Zoom H1 for different recording scenarios‚ adjusting audio levels for optimal sound quality‚ using the low-cut filter to reduce unwanted noise‚ and connecting the Zoom H1 to your computer for USB microphone functionality.
Furthermore‚ the YouTube channel often includes videos that address common user questions and concerns‚ providing visual solutions to problems you might encounter. By subscribing to Zoom’s YouTube channel and enabling notifications‚ you can stay informed about new videos and updates‚ ensuring you always have access to the latest tips and tricks for maximizing your Zoom H1 experience. Don’t hesitate to search the channel for specific topics related to your needs.